
1. Enable developer mode
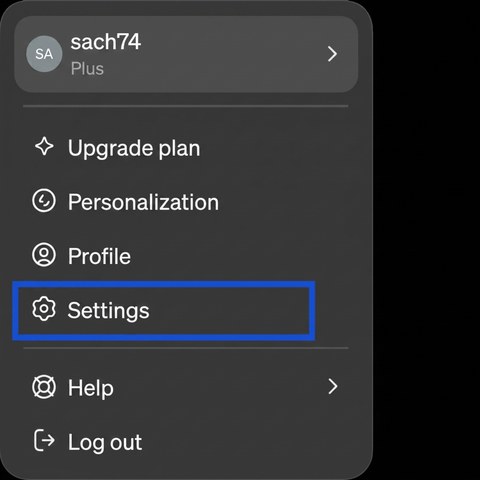
On chatgpt.com, click your profile in the bottom left corner, then Settings.
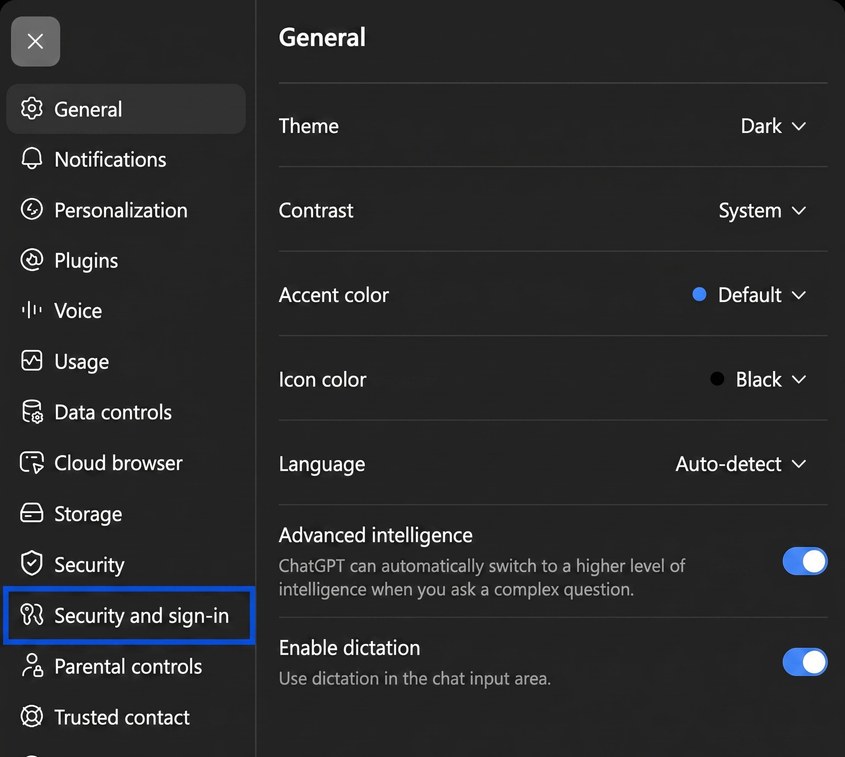
In the left-hand menu, open the security and connection section.
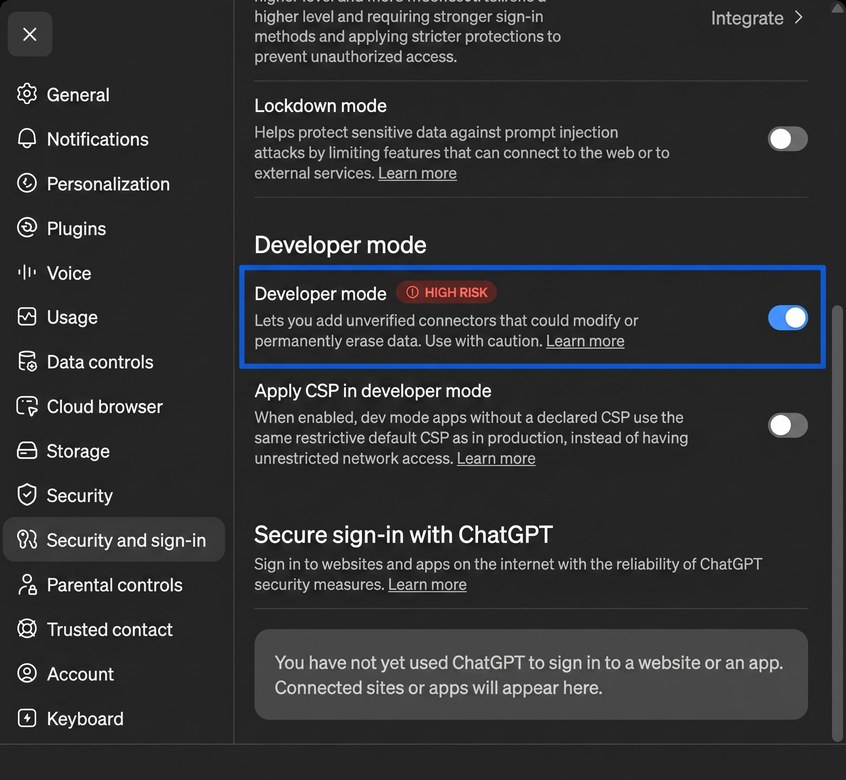
Scroll down to Developer mode and switch it on. This is what allows third-party plugins like Alpative.
2. Create the Alpative plugin
Still in the settings, open Plugins, then Browse plugins. Click the plus button in the top right corner to add a custom plugin.
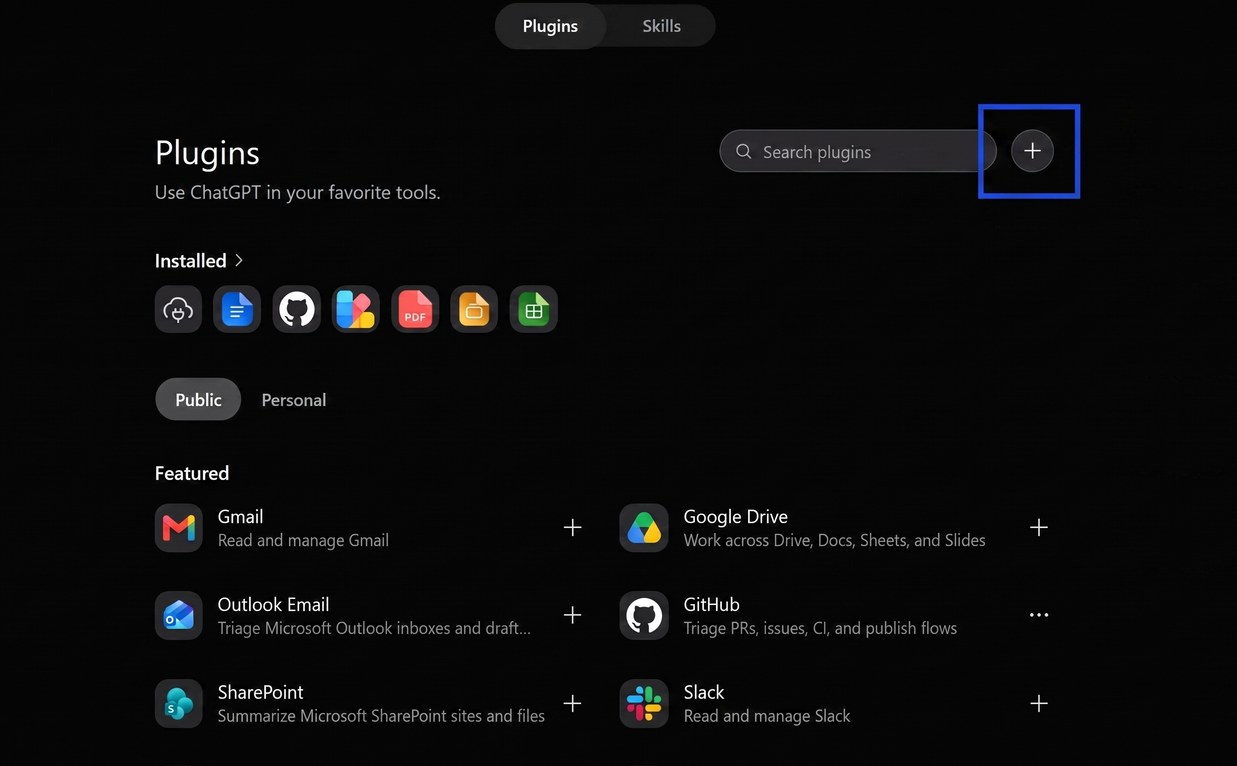
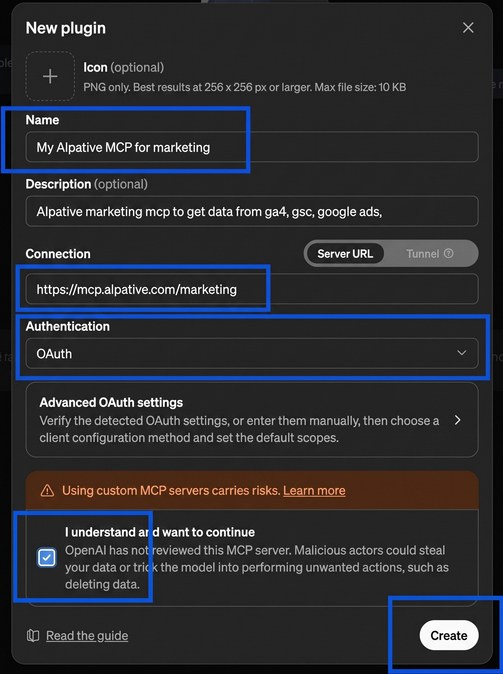
The New plugin form opens. Fill it in with the fields below; each one has its own copy button.
Alpative MCP
Live marketing data for this account via Alpative MCP: Google Analytics 4, Search Console, Google Ads, Meta (Facebook and Instagram), LinkedIn, Google Tag Manager and Google Sheets. Use this plugin whenever the user asks about website traffic, SEO, ad campaigns, conversions, period comparisons or marketing reports, so answers come from real account data instead of memory.
https://mcp.alpative.com/marketing
 Download the Alpative icon PNG 256 × 256, under the 10 KB ChatGPT limit. Drop it in the Icon field.
- Authentication: choose OAuth. This is the setting that matters: without it, the connection fails.
- Leave the advanced OAuth settings untouched: ChatGPT detects the configuration on its own.
- Tick the box to confirm you understand, then click Create.
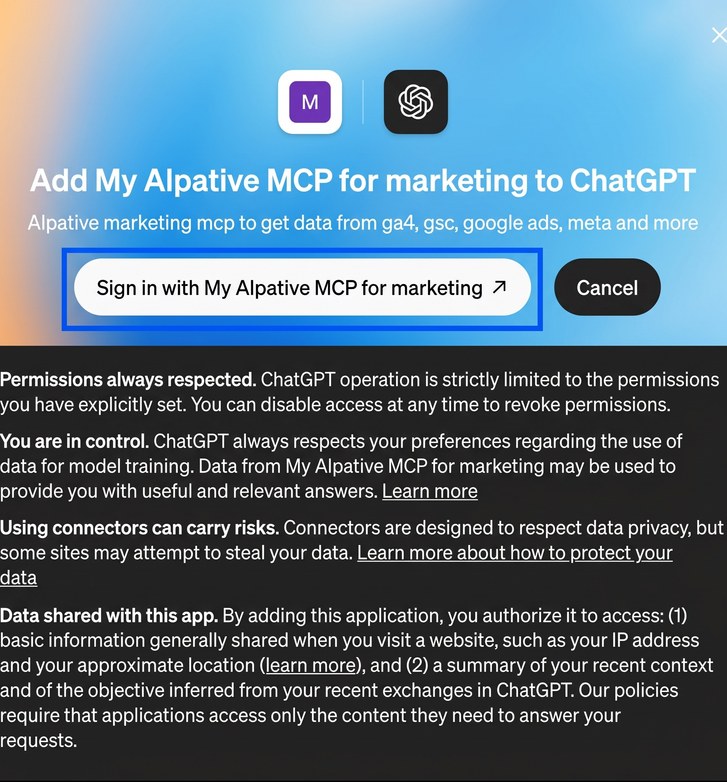
3. Connect and authorize
On the plugin's page, click Connect. ChatGPT opens the Alpative page: sign in, then authorize access.
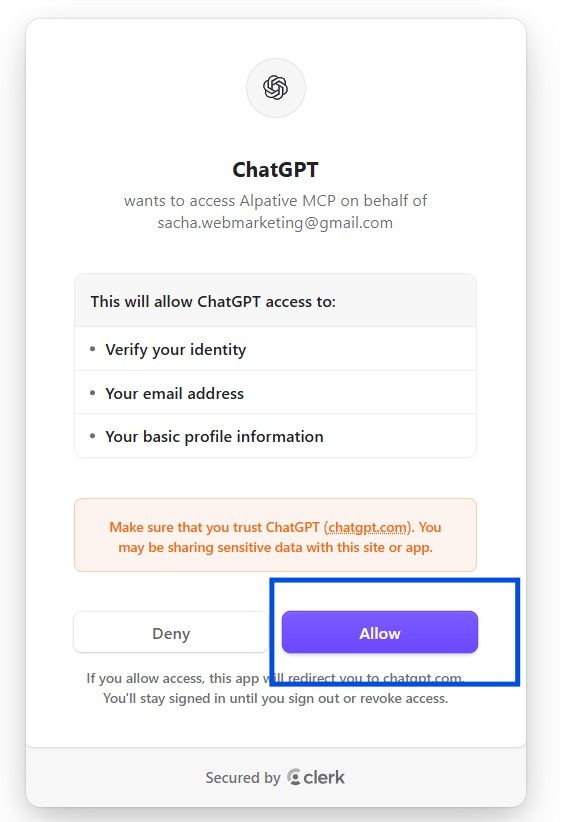
Back on the plugin page, the status switches to connected. You are plugged in.
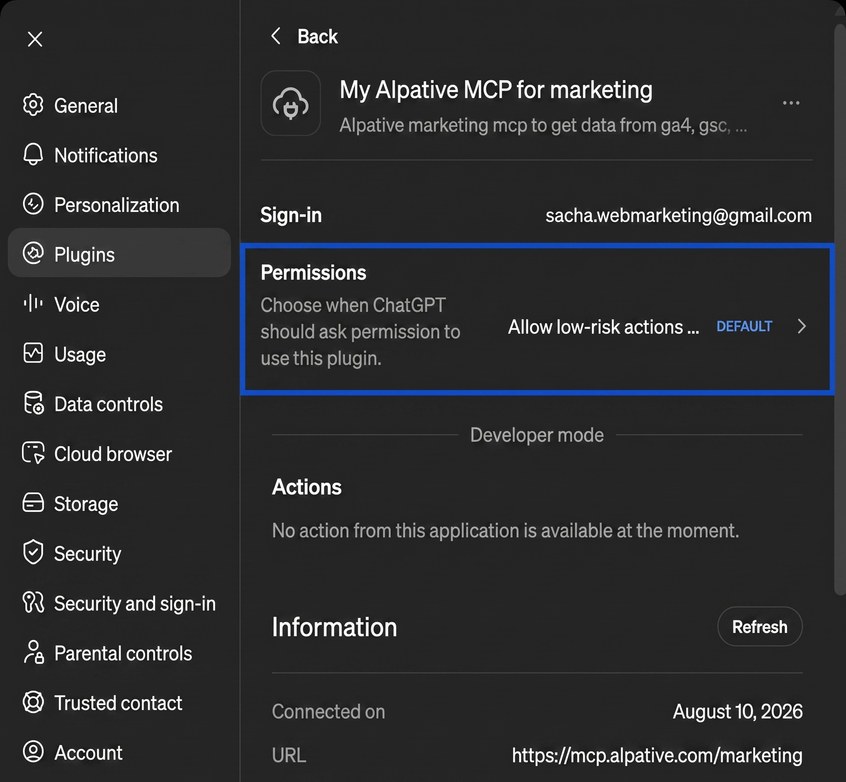
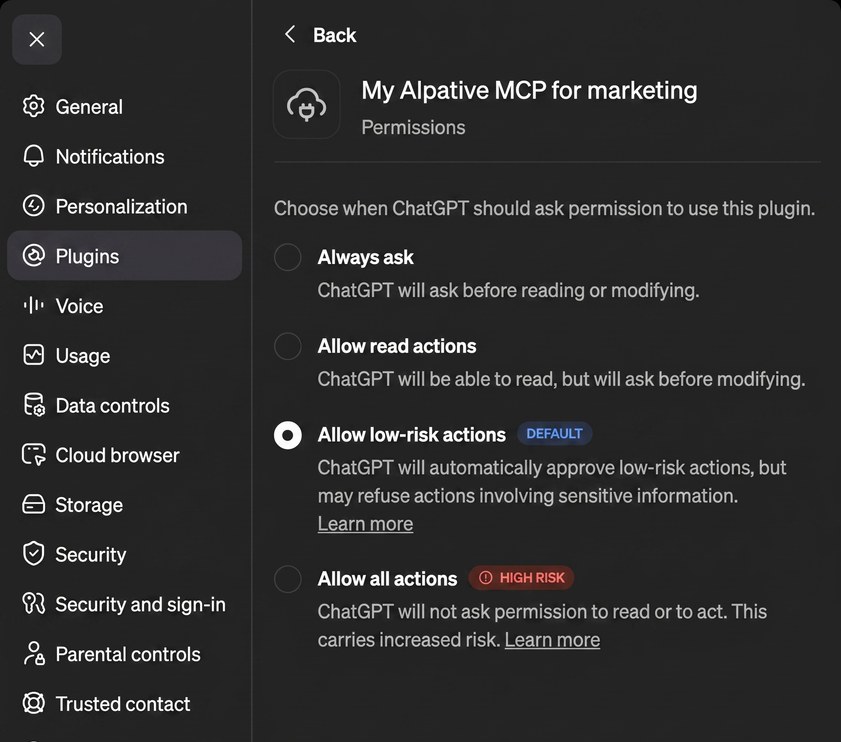
From this same page, you stay in control: you choose what your AI is allowed to do with the plugin, and you can cut the connection at any time.
4. Connect your data sources
The plugin links ChatGPT to your Alpative account. What remains is telling Alpative which data it may read: this happens in your Alpative console, under connections, not in ChatGPT. One Google authorization covers Analytics and Search Console; Sheets and Tag Manager connect separately, with the same Google account; each ad platform (Google Ads, Meta, LinkedIn and so on) connects in two clicks; each connector's guide details its prerequisites.
5. Your first question
List my Google Analytics properties available through Alpative MCP.
On my Analytics property [my property name], which acquisition channels grew and declined the most over the last 30 days compared to the previous 30? Give me a table and two hypotheses.
Replace [my property name] with the exact name from the quick check: your AI goes straight to the right data instead of searching, and burns fewer tokens.
The same Alpative account also plugs into Claude and any other MCP-compatible client, with the same URL.